
So, after doing a little bit of research on glycolic acid as I have been hearing lots about it the skincare world at the moment, I found out that pineapples were a great, natural and cheap source of it, so I decided to have a go at making myself a diy face mask using pineapples. All the ingredients for this face mask came to around £6.50 and you can get many, many uses from them, so definitely a great, purse friendly mask.
What you will need:
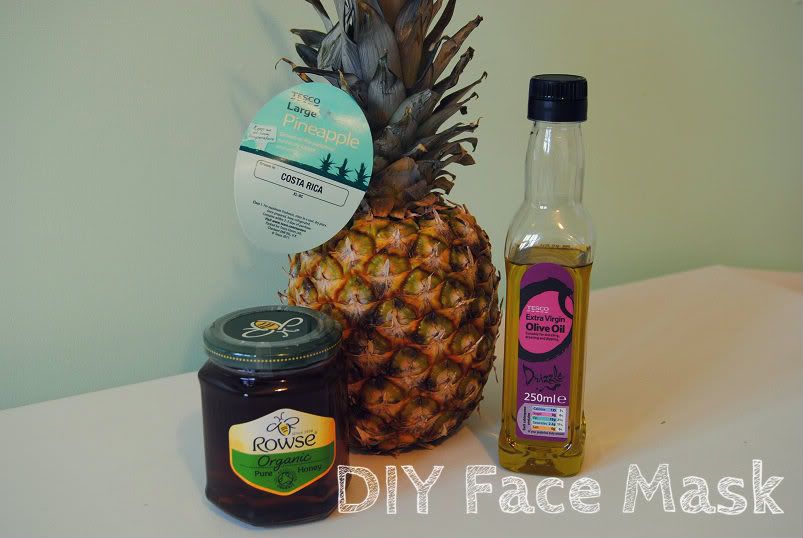
- Organic or Natural Honey
- Extra Virgin Olive Oil
- 1 Pinapple
- A bowl
- Something to mix and mash the face mask - I used a potato masher and then a hand blender
Benefits
- Pineapples contain AHA's (alpha hydroxy acids) which chemically exfoliate the skin. Sounds a little scary but it helps get rid of dead skin cells and leaves your skin incredibly smooth. Chemical exfoliatants are great for spot removal and prevention. The AHA's in Pineapple's are also known to have anti-ageing effects. Pineapple is also a gentle astringent which helps with visible pores and leaves skin feeling refreshed and healthy.
- Extra Virgin Olive Oil is a perfect addition to the mask as it helps to nourish and moisturize the skin. Unlike some other oils, olive oil will wash away easily leaving skin feeling supple and nourished.
- Organic Honey is also another great way of moisturising the skin. I regularly use organic honey on it's own as a mask when my skin is feeling dry as it has great moisturising properties. Honey may also reduce inflammation and swelling which is great if you have any sore spots etc.
How to:
- Cut the pineapple into two rings making sure the outer layer of spikey skin and the hardness in the center have been removed.
- Place pineapple rings in a bowl and begin to mash and blend until satisfied.
- Measure 1tsp of organic honey and 3tsps of extra virgin olive oil. Pour these into the mixture and blend/mix until happy. The mixture should be a thin consistency and have very small chunks of pineapple in it.
- Rub the mixture all over your face (make sure it has been cleansed beforehand) avoiding the eye area, until you have the desired amount on. This can get quite messy so I recommend doing it over a sink as the mixture is not very thick and it will drip and slide off your face to begin with.
- Once you have desired amount on your face then lie down and relax for 10-20 minutes.
- Wash away gently with warm water and finish with a splash of cold water to close pores. Then gently pat dry with a clean towel.
- Follow with a moisturiser to lock everything in.
The Results
My skin felt really supple and smooth after using this mask. It did sting and irritate my skin a little whilst it was on but this did not affect my skin negatively afterwards at all. My skin felts nourished and around my nose, chin and forehead, where my skin tends to be very uneven, was very smooth. I also noticed that my skin looked 'glowing' and it was much more clearer for the following days. It did leave a little bit of a film over my skin but that had disappeared by the next morning. I really liked the effects of this mask and will definitely make and use it again! I recommend only using this mask 1-2 times a week otherwise it may be too harsh.
Will you be trying this mask?
'Til Next Time,

Wow that's really cool! I love that you've written about the benefits of the ingredients! I never knew pineapple was so amazing for the skin, I'm surprised it isn't used in more products! I'll definitely be trying this out, great post :)
ReplyDeleteEleanor x